Grav Blog Setup: The Ultimate Guide
3 Aug 2020 •Grav CMS
So, you’re interested in how to add a blog with Grav: the powerful, crazy fast flat-file CMS. You may have a pre-existing installation or are looking to start from scratch. This tutorial will guide you through everything you need to create a fully-featured Grav blog, with easy to follow step by step instructions.
Here's an overview of the topics we'll cover:
- How to Install Grav
- How to Add Pages
- How to Edit Content
- Page Templates
- Page Collections
- Taxonomy
- Grav Blog Plugins
- Grav Blog Themes
Let’s get cracking!
How to Install Grav
To get started with Grav 1.6 you’ll need access to a web server running PHP version 7.1.3 or higher.
- Navigate to Grav Downloads and download the package titled Grav Core + Admin plugin. Being a flat-file CMS you could build an entire site by manually creating and editing text files with just the Grav core package, but why would you want to? The Admin Panel plugin adds a user friendly web interface to perform these actions, and is the recommended choice for newbies and experienced users alike.
- Inside the archive will be a directory title grav-admin. Extract the contents of that directory to the webroot of your webserver.
- If all goes well you should now be able to access the site in your web browser. You should initially be presented with the Grav Admin User Registration Page:
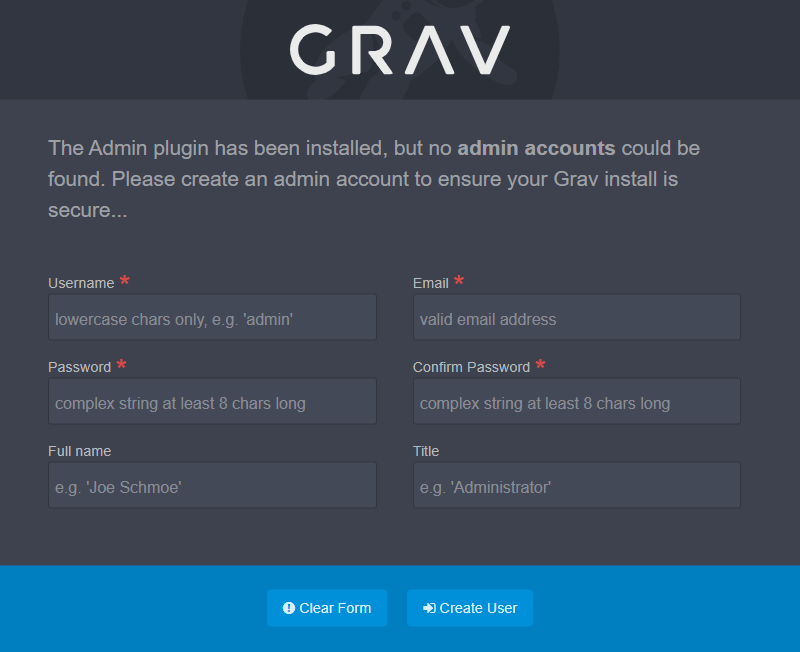
- Enter the required information to create your Admin user and you will next be directed to the
/adminroute. This is the Grav Admin Panel where you will log in to administer your site. From here you can create, edit and delete pages, install themes and plugins or create site backups.

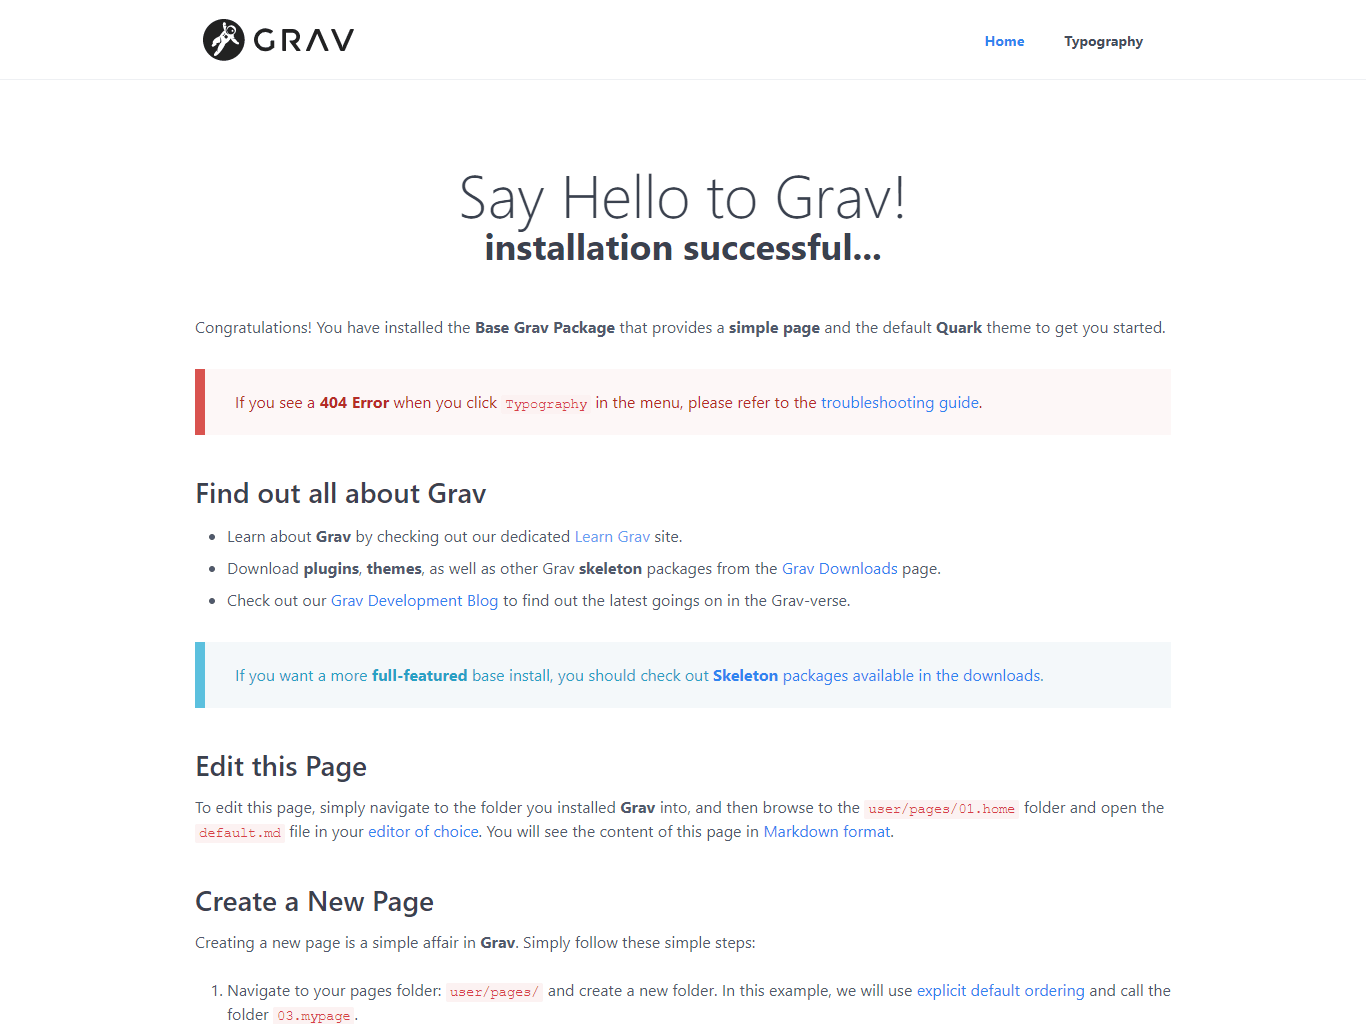
- To view your site as a user would, simply remove
/adminfrom the URL and you will be presented with the example homepage:
How to Add Pages
Now that we have a working Grav installation let’s dive in and create some pages. We’ll start by adding what will eventually become our blog overview page:
- Log in to the Admin panel with the username and password you created earlier.
- Select Pages in the navigation pane.
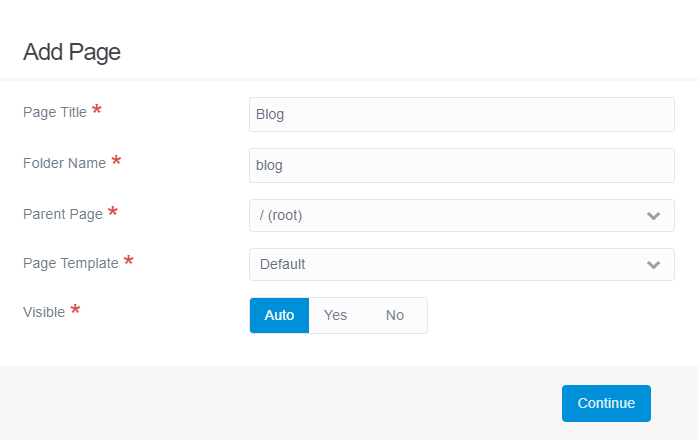
- Select the Add button at the top right. The Add Page dialogue appears.
- Enter “Blog” as the page title.
- Leave all other fields at their default settings for now and select Continue.
- Upon selecting Continue you’ll be taken to the page editor screen. It’s worth noting that the page has not actually been saved yet, so go ahead and select Save in the top right.
That’s all we need for the overview page at this point. Let’s repeat the above process, but for our first blog post:
- Select Add from the top right.
- Enter a title for your first post. My Grav blog example is going to be a fictional movie review site, so I’ll start with the 1982 sci-fi classic Blade Runner.
- This time under Parent Page select “Blog” (the page we created previously).
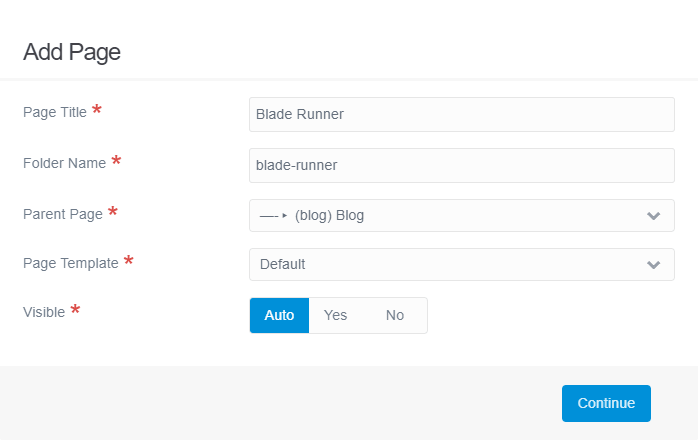
- Leave all other fields at their default settings and select Continue.
- Select Save.
How to Edit Content
We are now at the point of entering some actual page content. Let’s take a quick tour through some of the input fields and see what’s what.
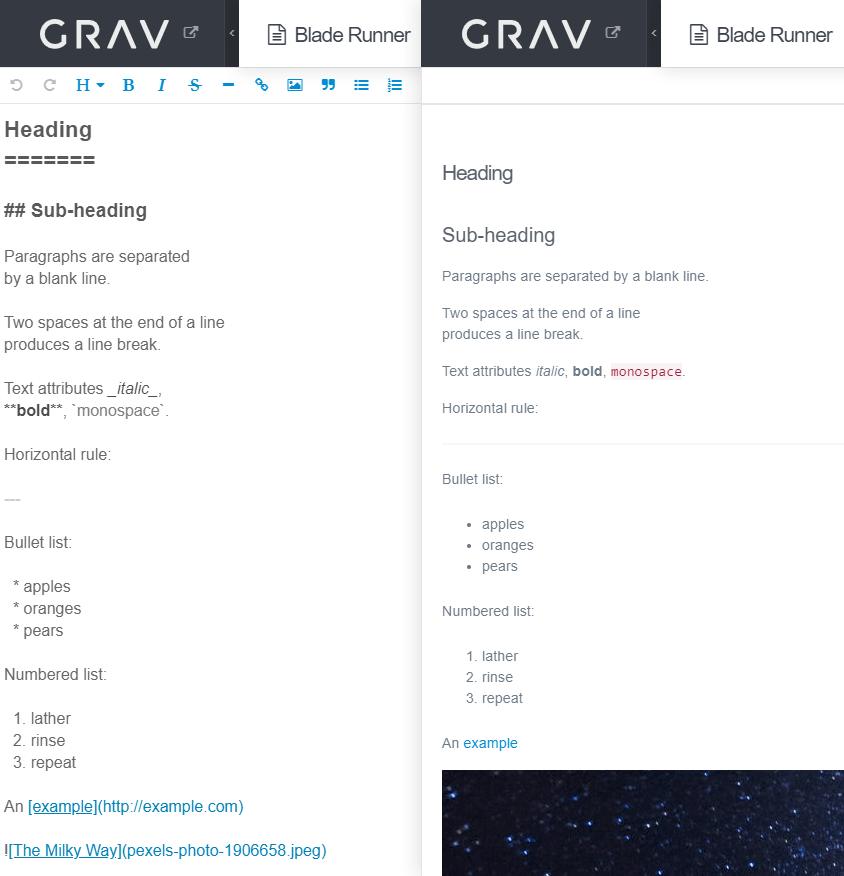
As you would expect, this first tab is where you will enter the text and images that will form the body of your page. Grav supports the popular Markdown format, providing you rich-text editing capabilities without needing to know the full intricacies of HTML. If you are unfamiliar with Markdown syntax, never fear, as Grav provides a handy toolbar which will apply the relevant syntax to selected text at the click of a button.
On the other hand, if you are comfortable coding in straight HTML, Grav supports that as well.
The tools at the top right of the input field allow you to preview your rendered Markdown or HTML so you can get an idea of how your content will appear once you hit Save.
Whilst Markdown with the occasional sprinkling of HTML is normally sufficient for your average blog, Grav can also be configured to enable Twig support, giving you access to variables, loops, arithmetic and much more. Grav page templates and themes are built on Twig, giving you a great deal of power and flexibility through a highly readable, easy to learn syntax.
Next, let’s add some content to our blog post:
- On the Content tab, add some text into the big input field.
- Drag and drop an image or two into the Page Media section.
- Have a play around with the tools available in the toolbar to see what’s possible with the WYSIWYG editor.
- When you’re happy with your content, select Save.
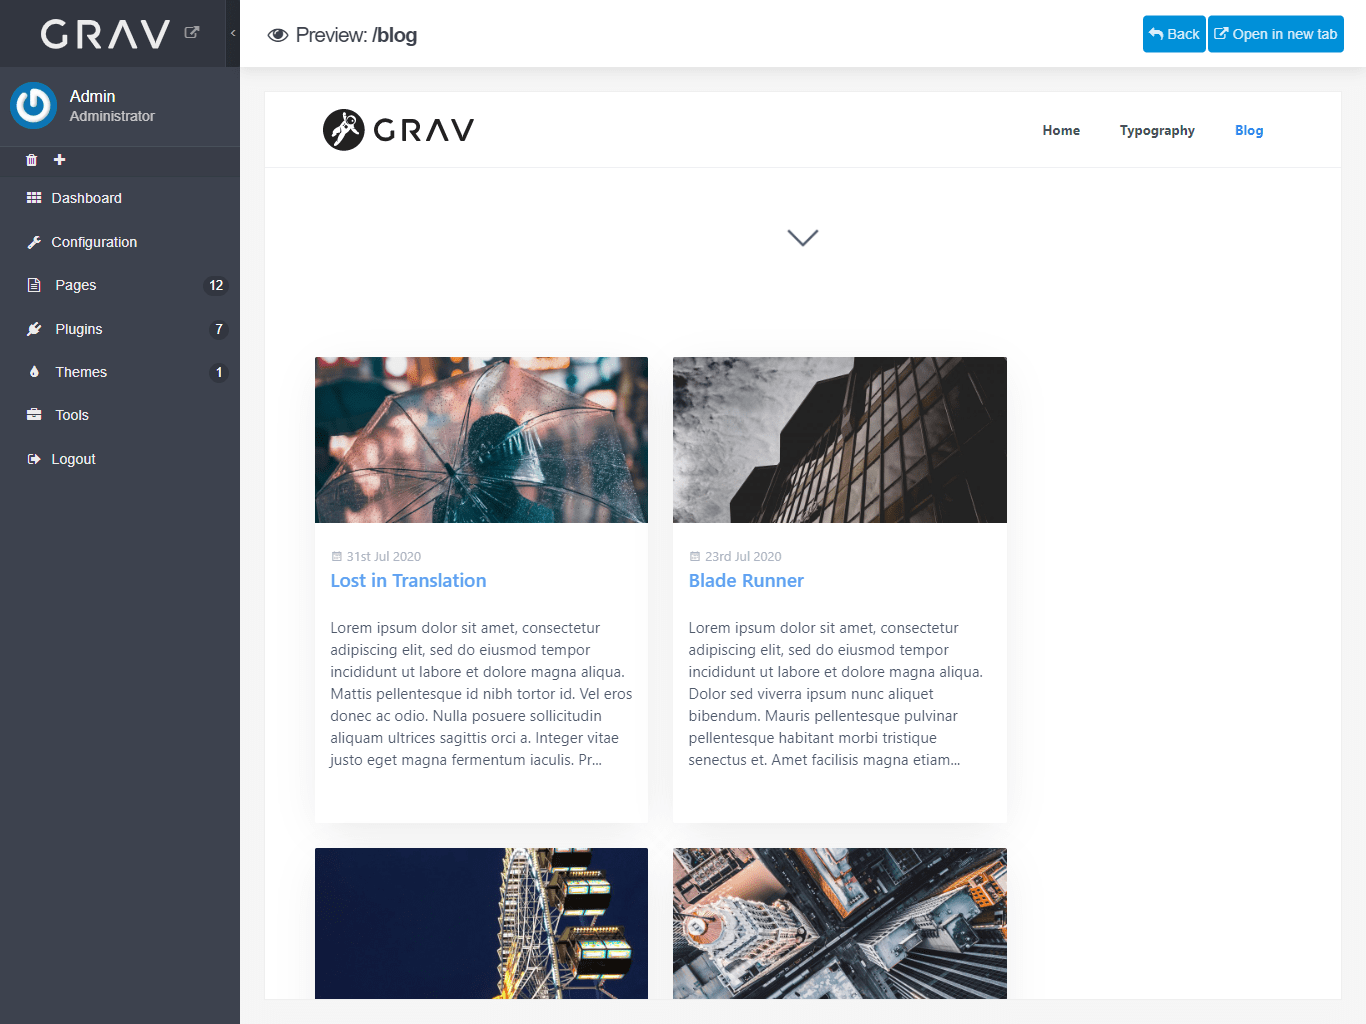
Now that the hard work of content creation is complete, it’s time to see what our audience sees. Select the eye icon at the top right of the screen to preview the page within the Grav editor.
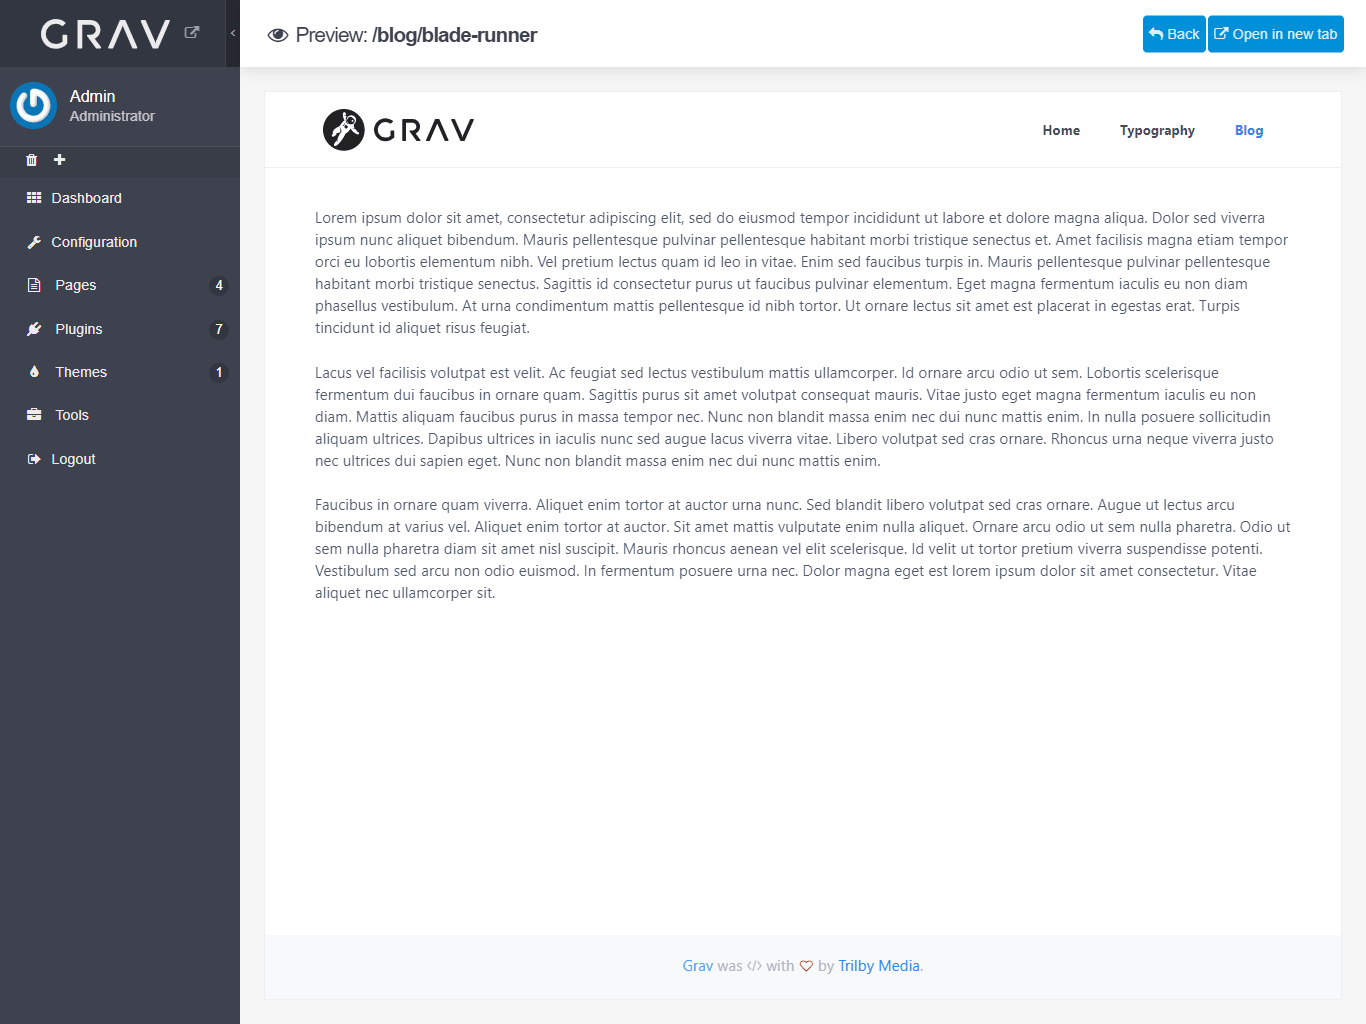
We can now see the page as our readers will see it with the theme styling applied.
You may also note that a “Blog” item has been added to the menu. This is one of the features of the Quark theme - it will automatically add all top-level items to the navigation. You can control the order of these items in the editor of any top-level page in the Ordering section on the Advanced tab.
Now, that’s all well and good, but it still looks pretty boring for a blog post. The truth is I may have intentionally misled you a little earlier on in order to now demonstrate the power of Grav page templates…
Page Templates
Cast your mind back to when we created the page for our blog post. I had you leave the Page Template at the default setting, aptly named “Default”. Page templates are defined by the selected theme, in this case Quark, and Default is the most basic of page templates included. It doesn’t do too much beyond dropping your content in between the site-wide header and footer. Lucky for us there is another page template included titled “Item” which is made specifically for blog posts.
- If you're still in preview mode, select Back in the top right menu to return to the page editor
- Select the Advanced tab
- Locate Page Template under Settings and switch it from Default to Item
- Select Save
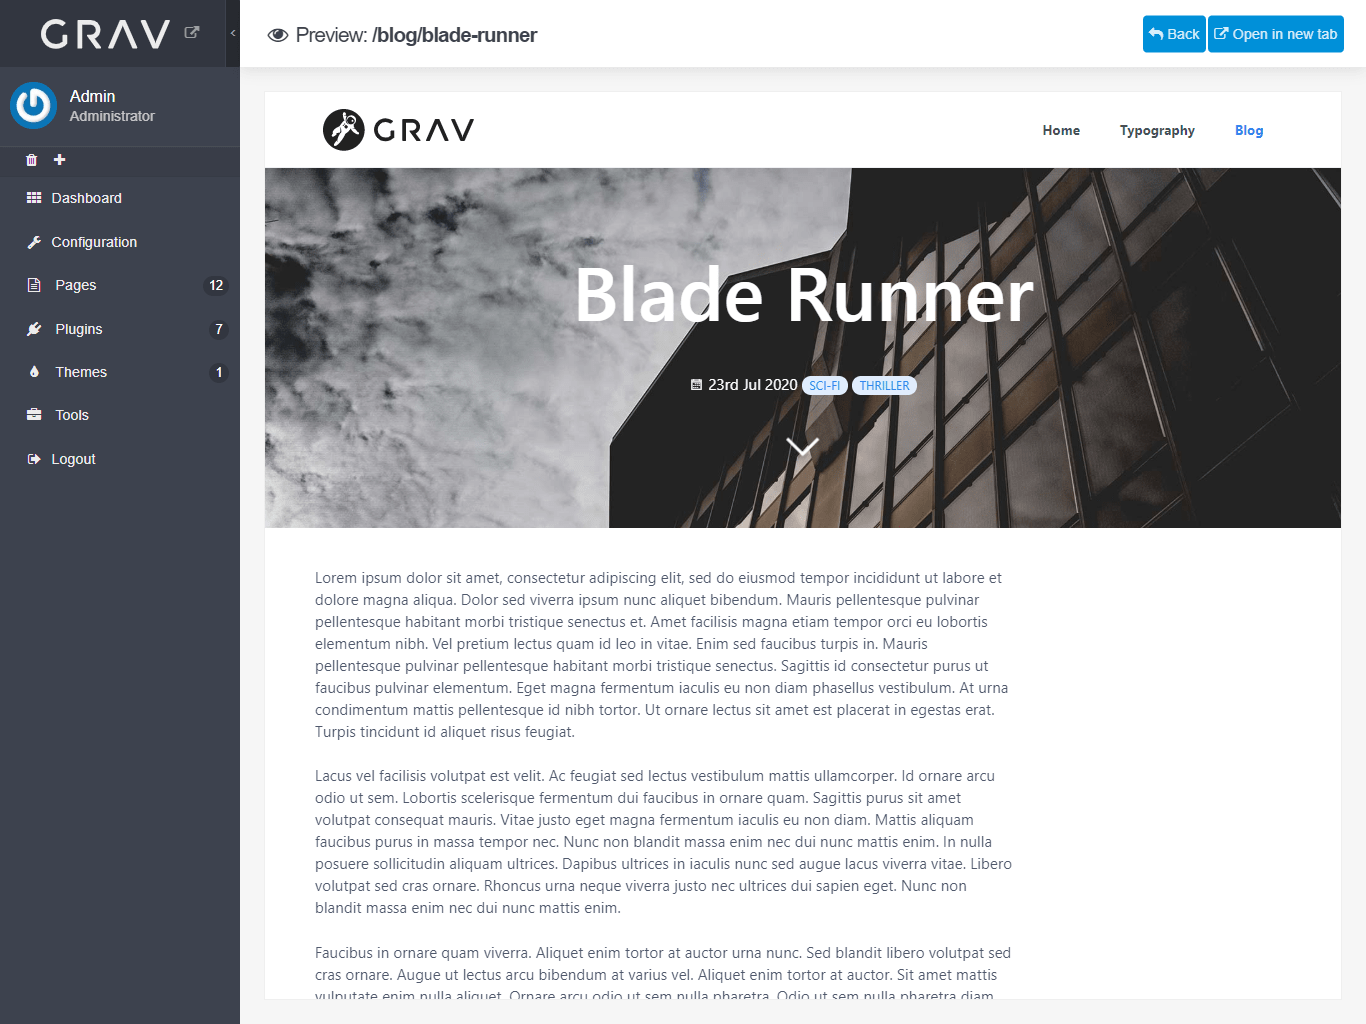
- Select the eye icon to preview the page again.
You should hopefully notice the following differences straight away:
- The page title is prominently displayed as the main heading.
- The publication date now appears beneath the title.
- Previous and Next buttons are now available at the end of the post.
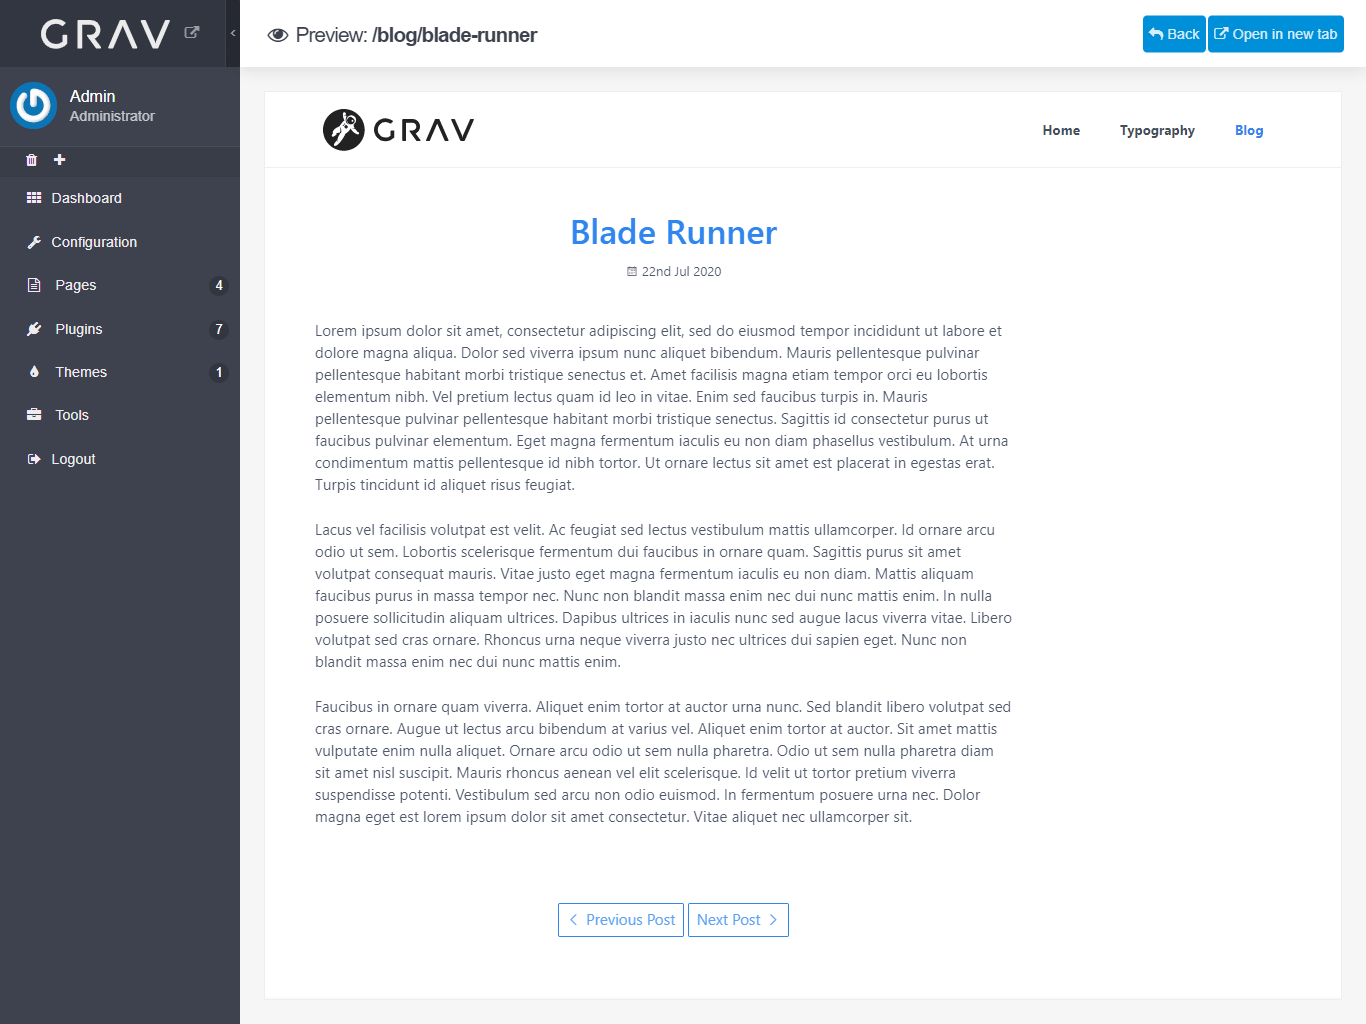
All of this just by changing the page template. Pretty neat, right?
Select Back again in the top right to return to the page editor. You will notice something different here too: the addition of a new tab titled Blog Item. How this works is that the base Grav page editor has been extended by the Quark theme (which the “Item” page template is a part of).
There are a couple of handy features available on this tab, one of which is to set a hero image:
- If you haven’t done so already, return to the Content tab and upload an image to your post by dragging and dropping it onto the Page Media section at the bottom of the screen. Select Save.
- On the Blog Options tab, select the desired image from the drop-down beside Hero Image. Save and then preview the page.
- Depending on your image you may or may not be able to easily read the text overlaying it. Return to the editor and experiment with applying the different classes listed below the Hero Classes input field.
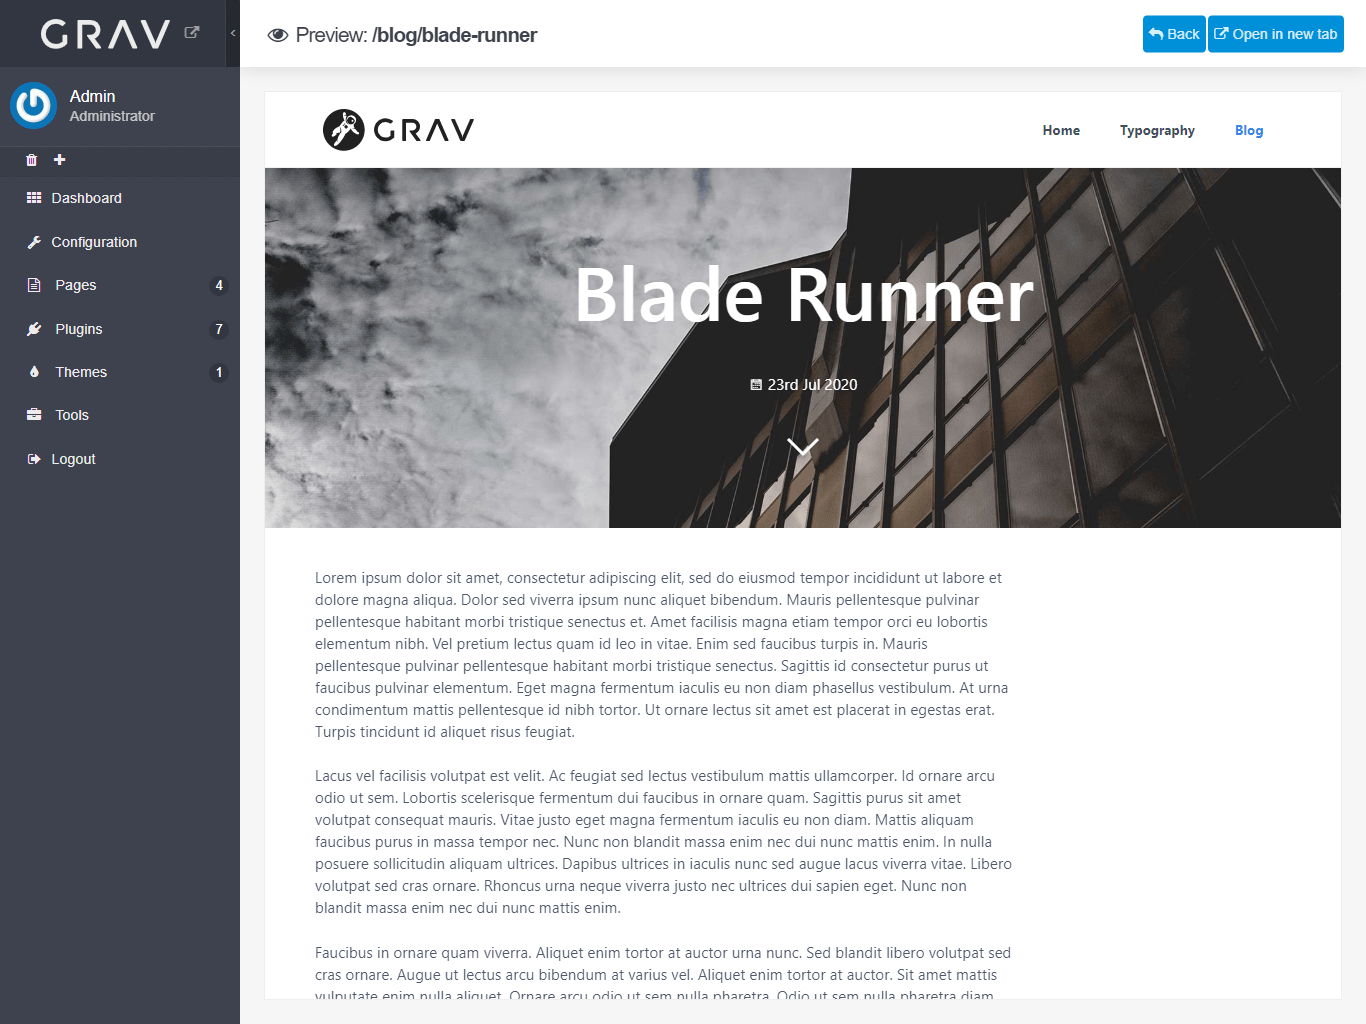
Starting to look pretty good, hey?
That should cover all the basics for creating and editing pages at the blog post level. In a moment we’ll delve into creating a blog overview page, dynamically generated by harnessing the power of Grav page collections. Before that though, we need a collection of pages to add to our overview page. Go ahead and repeat the steps above to create as many blog posts as you like.
Page Collections
Now you’ve got a collection of blog posts created, let’s move on to the next item: the blogroll or blog overview page. You could of course manually create this page, adding to it whenever you publish a new blog post. Like any repetitive process though, doing it manually is not only tedious, but it widens the margin for human error. Better to automate where possible, and Grav has just the thing.
If you view your /blog page now it won’t look like much. Just the menu and an empty white page. As you may recall, when we created this page we left all settings at default, including the page template. Load up the /blog page in the page editor again, select the Advanced tab, update the Page Template from Default to Blog and hit Save. Just like when we updated the template on the blog post, you will notice a new tab has appeared, this time titled Blog Config. Select it and locate the Items input field under Content Definition. It should have a default value of @self.children. You'll just need to update that slightly to read - @ self.children. Hit Save again and then Preview and you should be in for a pleasant surprise.
You should now have a dynamically generated grid containing preview images and text from your blog posts! How is this possible? Through the power of Grav page collections!
The content items value of - @self.children is essentially shorthand telling Grav to create a collection of all pages directly beneath this page i.e. its children. To get all pages descendent from the current page i.e. its children and its children’s children, you would use - @self.descendants. There are many other page collection options available in Grav, including parents or siblings of the current, root or given path.
The other values defined here should be fairly self-explanatory, giving you control over the ordering and number of items per page. It’s worth noting that the pagination options won’t do much until we have the Pagination plugin installed, which will look at later in the tutorial.
Next up we’ll look at adding some tags to our posts with Grav Taxonomy.
Taxonomy
Now that we have our blog overview page in place, let’s look at adding some taxonomy tags to our posts which will allow our users to filter which posts they’d like to see more of.
- Open up one of your blog posts in the page editor and navigate to the Options tab.
- Under the Taxonomy heading enter one or more relevant tags for the post. Tags only need to be created once, and as you add more they will begin to form a drop-down list of all the tags you’ve used across the site.
- Select Save and then Preview.
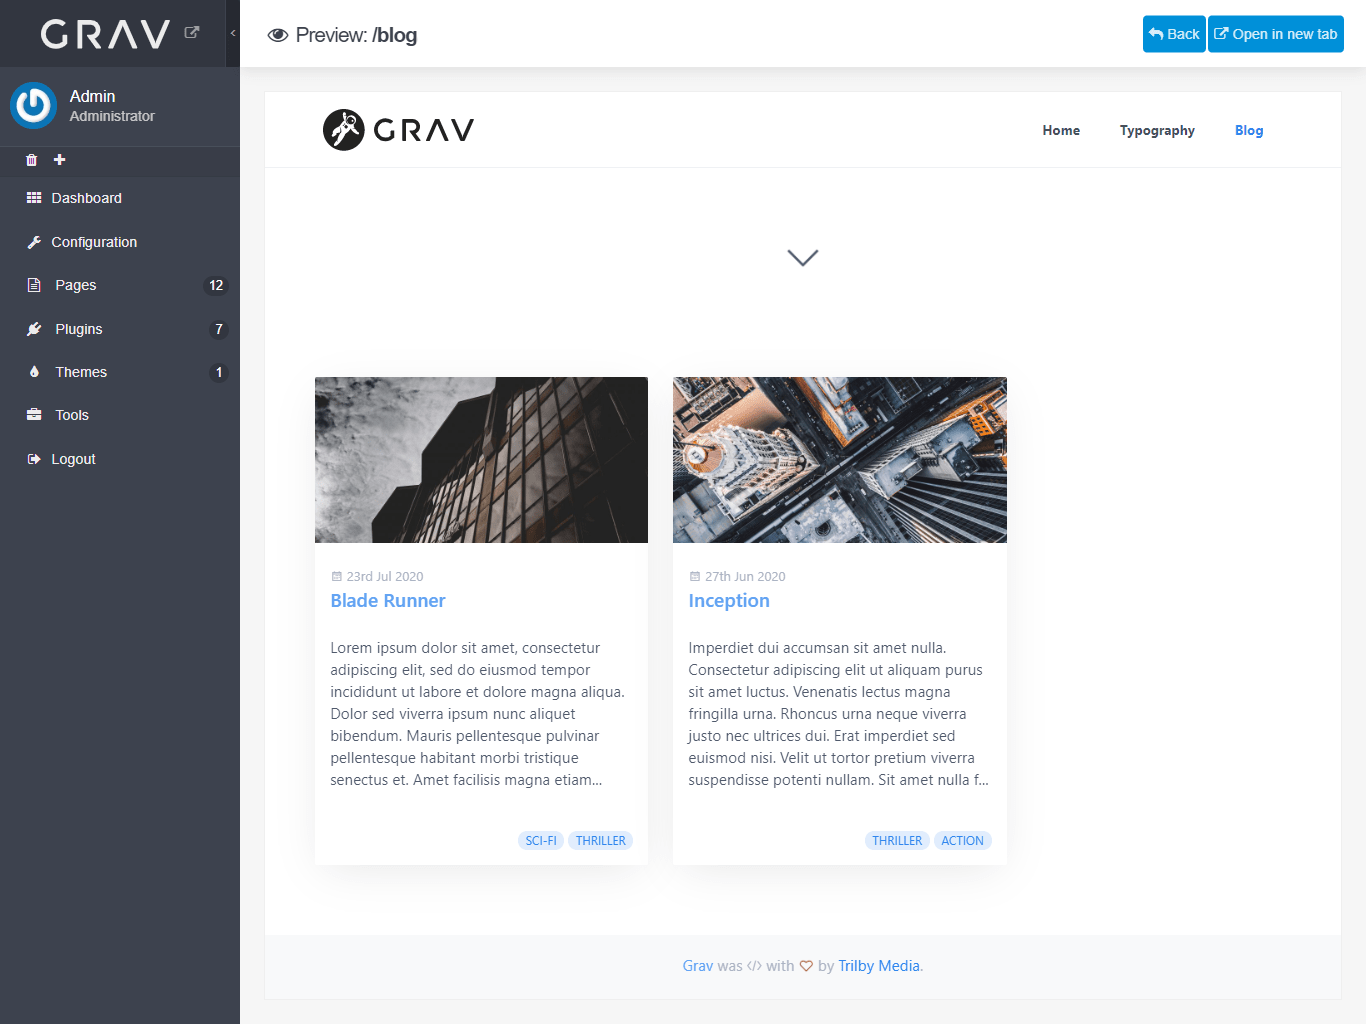
You’ll see the tag(s) now appear alongside the publication date. Selecting a tag will return you to the blog overview page, but this time the contents will be filtered to collection of pages with that particular tag only. Tag a few more of your posts and view the page again to better see the results. Here is how my blogroll appears after I select the "thriller" tag:
Grav Blog Plugins
We’ve now covered the basics of what you can achieve with the core Grav package and default theme. But it doesn’t end here, not by a long shot. There are many plugins available to extend Grav’s core functionality for any additional features you may require.
Pagination
One plugin that I see as being essential to any blog site is the Pagination plugin. It will allow us to break up our blog overview page into multiple pages. Unnecessary, perhaps, when you only have 5 blog posts. But once you have 55 it becomes essential or that page load time is going to be killer.
How to install a Grav plugin:
- From the Grav Admin select Plugins from the navigation panel on the left.
- Select Add from the menu in the top right.
- Feel free to browse the various plugins available or use the search box to find the one you need, in this case Pagination.
- Optionally, select the drop-down arrow to read about the plugin
- Select the Install button to begin installation
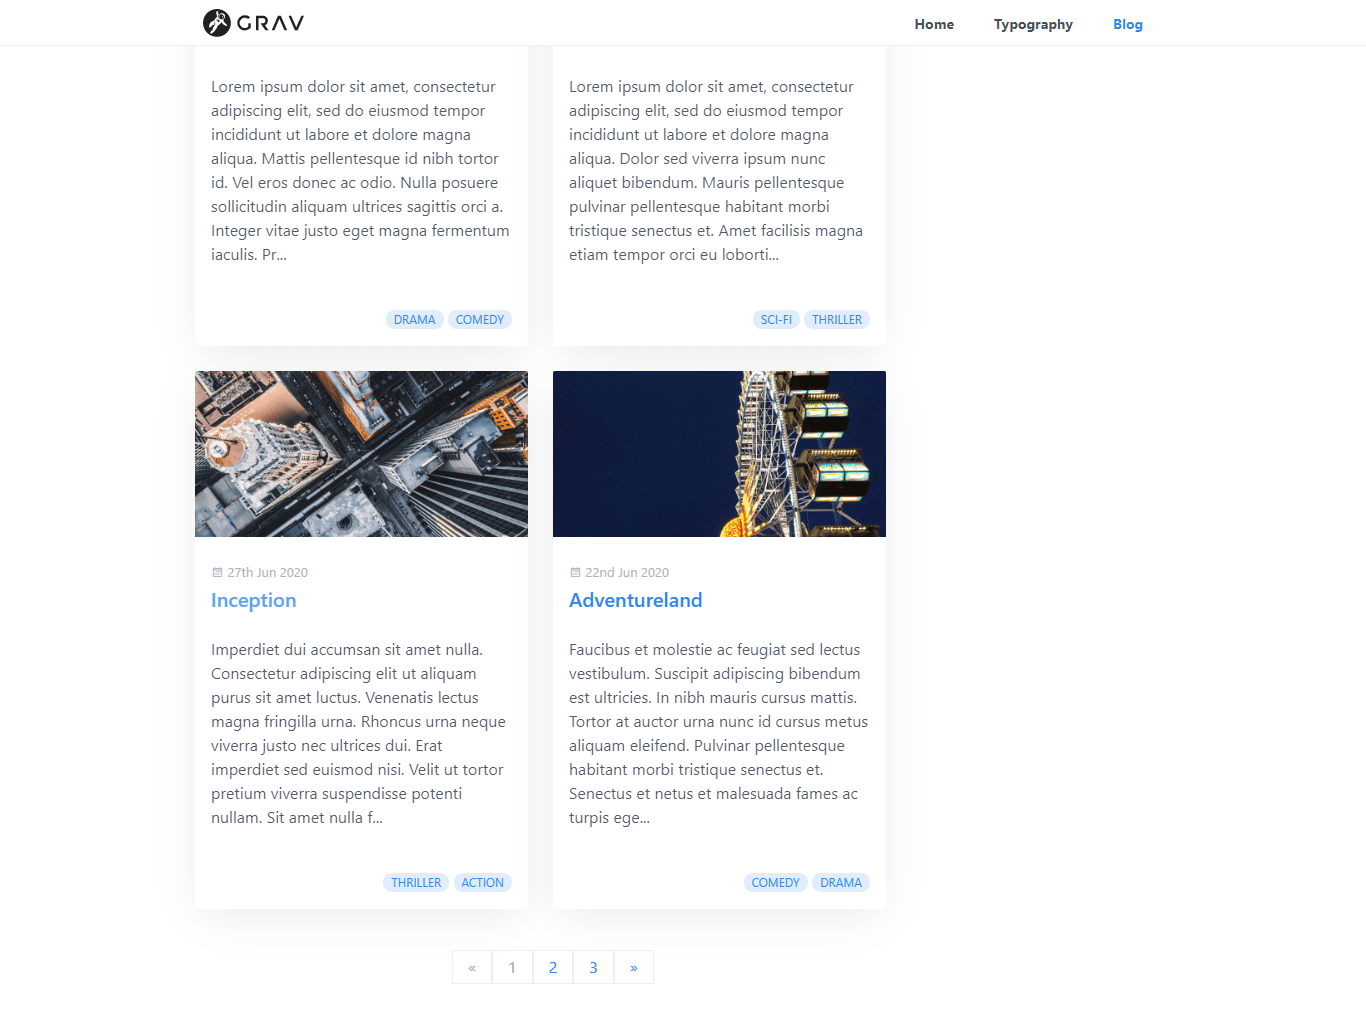
Once installation is complete open a new browser window and navigate to your blog overview page. Provided you have a greater number of blog posts than the Max Item Count value in your Blog Config tab, you’ll now see a new content block allowing you to navigate through the available pages.
Meta Tags and Structured Data
Another useful item for blogs is the inclusion of meta tags and structured data. This is an essential part of technical SEO and will make your posts look great in Google results and when shared on social media.
For this I recommend the Aura plugin, which you can install via the Grav Admin panel as detailed above.
Once installed there are just 2 fields to complete to enable the plugin. Under Organization Information enter your name, or the name of your organisation, and your website URL then select Save. This is enough to get you started, but it should be noted that the more information you enter here, the richer your shared content will be.
To add meta tags to your posts for sharing on Facebook, Twitter, LinkedIn etc.:
- Open up one of your blog posts in the page editor and select the newly added Aura tab.
- Select Article as the Page Type.
- Enter a short (140-160 character) description of your post.
- Select a preview image from those attached on the content tab.
- Select Save.

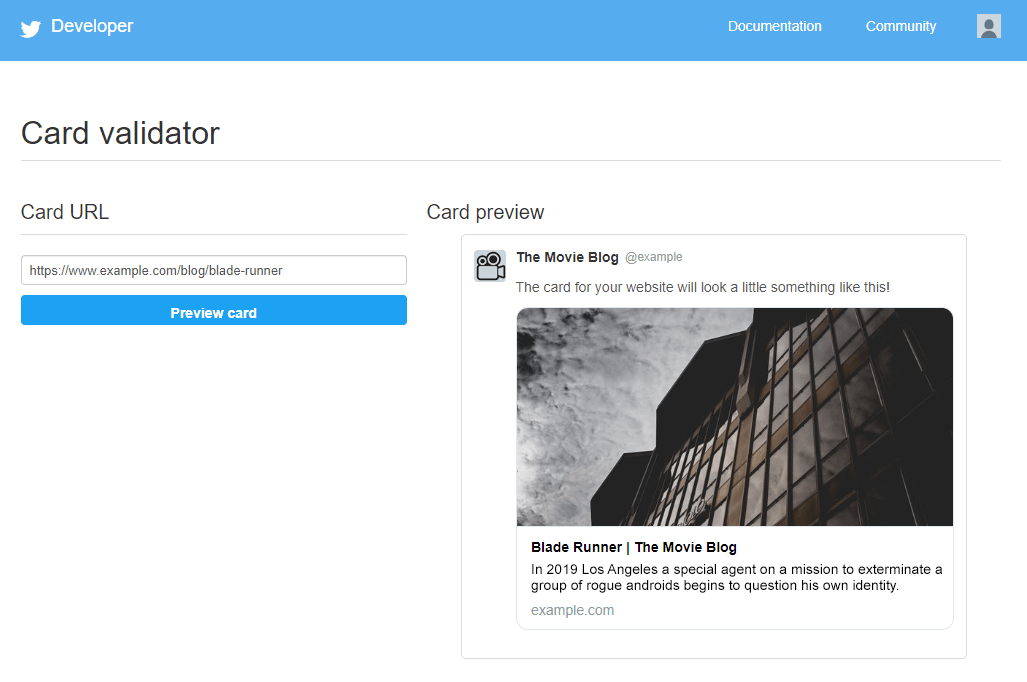
You can now verify the correct metadata has been added by using one of the various social media inspection tools:
Search
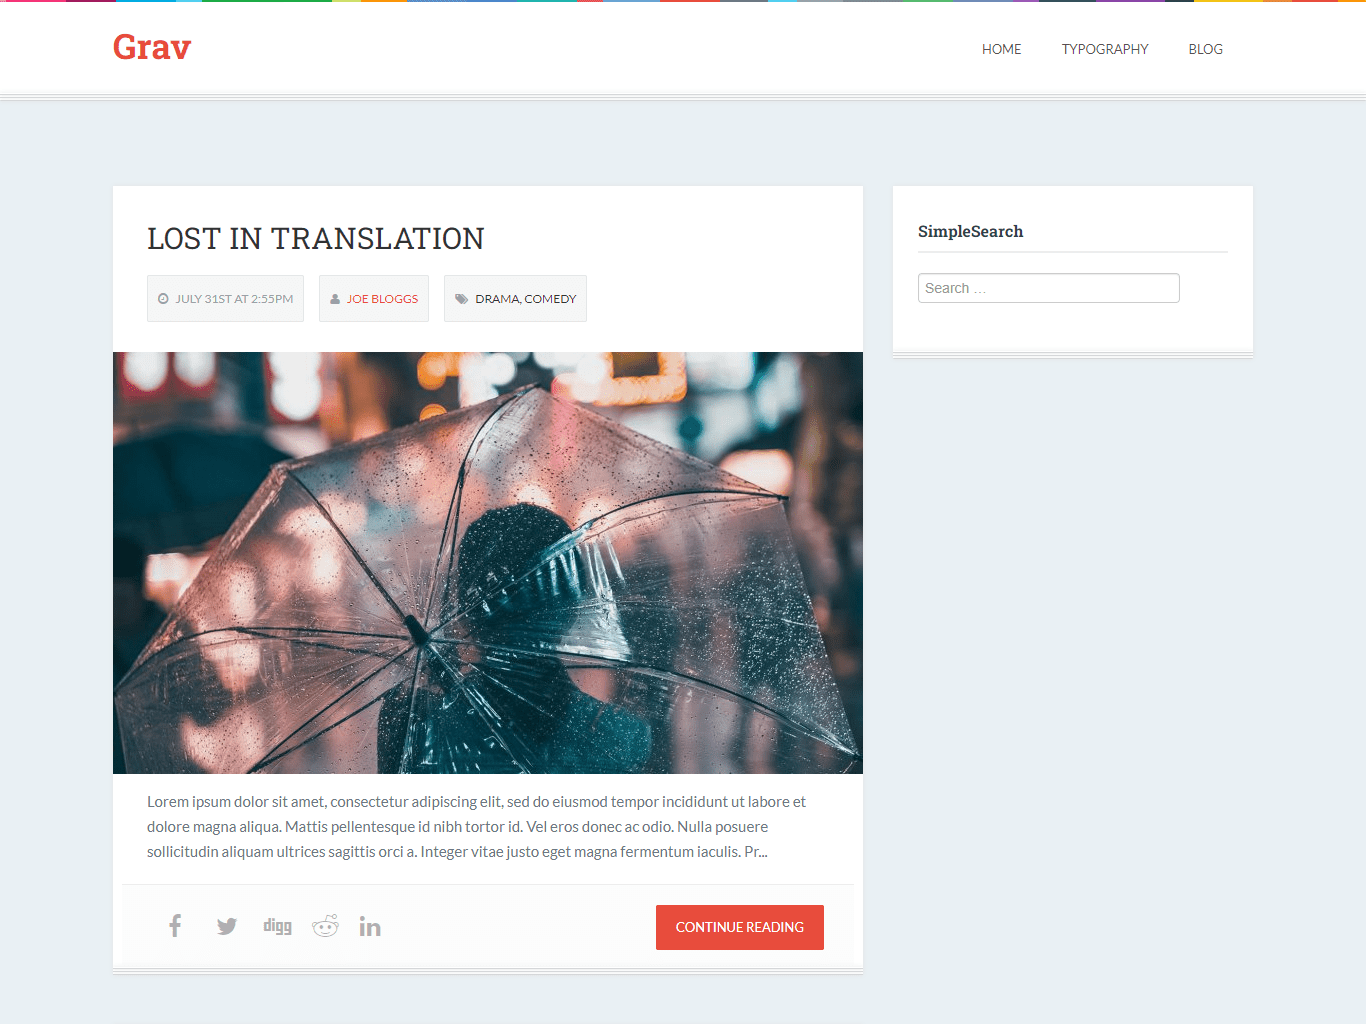
As your blog grows both in the number of posts and different topics covered, your users may find a search function useful to quickly pinpoint the information they’re after. For this you need look no further than the official Grav SimpleSearch plugin.
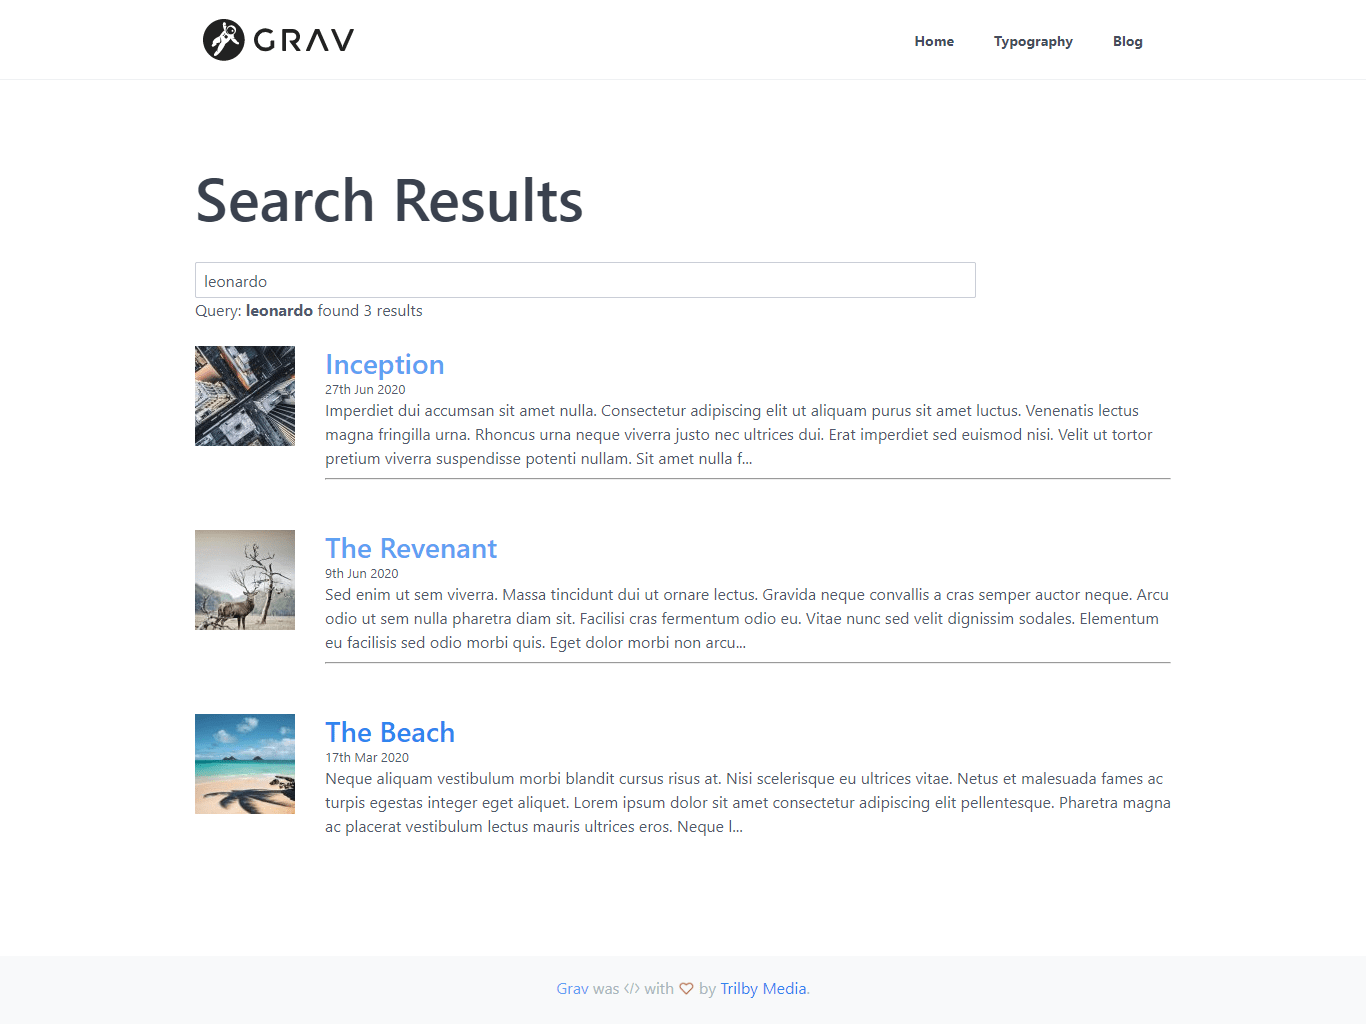
SimpleSearch integrates seamlessly with the Quark theme to add a search box to the sidebar visible on both your blog overview page and within each blog post. It can also of course be easily added to your own custom theme. Once installed, head over to the blog page, enter a search term and hit enter. The results are listed with a preview of each page matched.
As with most Grav plugins there are a variety of configuration options you can tweak to get it working just the way you want, and you can always extend or override the included CSS or JS to have it match your site’s individual style and function.
Related Posts
Another item commonly found on blog sites to both assist your users with navigation and keep them on your site a little longer is a related posts feature. As you’ve probably guessed by now, there is an official Grav plugin for this as well: Related Pages. As with SimpleSearch, it works straight out of the box with the Quark theme, matching similar posts by content and tags. The results are displayed in the sidebar of each individual blog post.

Related Pages has several methods by which pages can be matched and can be fine tuned to your specific requirements via the Plugin configuration panel.
Comments
Want to increase engagement with your site? What better way than to enable comments on your blog posts. There are a few options to implement this with Grav but in this example we’ll look at integrating Disqus comments with the JSComments Grav plugin.
If you are unaware Disqus is a blog comment hosting service which can be integrated into a wide range of platforms. There are free and paid plans which offer a variety of features such as moderation tools, analytics and email notifications.
JSComments is a versatile plugin for Grav allowing integration of comments systems from various providers such as Discourse, Disqus and Facebook.
Once you’ve created a Disqus profile, install JSComments on your Grav site and set the Provider to Disqus. Flip over to the Provider settings tab and enter your Disqus Shortname. The final step for a basic installation is to add the following code snippet to the relevant Twig template where you would like the comments widget to appear.
{% if config.plugins.jscomments.enabled %}
    {{ jscomments()|raw }}
{% endif %}
For the Quark theme a good place is in templates/item.html.twig within the innermost <section> tag:
<section id="body-wrapper" class="section blog-listing">
<section class="container {{ grid_size }}">
{% if show_breadcrumbs and config.plugins.breadcrumbs.enabled %}
{% include 'partials/breadcrumbs.html.twig' %}
{% endif %}
{% embed 'partials/layout.html.twig' %}
{% block item %}
{% include 'partials/blog-item.html.twig' %}
{% endblock %}
{% block sidebar %}
{% include 'partials/sidebar.html.twig' %}
{% endblock %}
{% endembed %}
{# Include JSComments here #}
{% if config.plugins.jscomments.enabled %}
{{ jscomments()|raw }}
{% endif %}
</section>
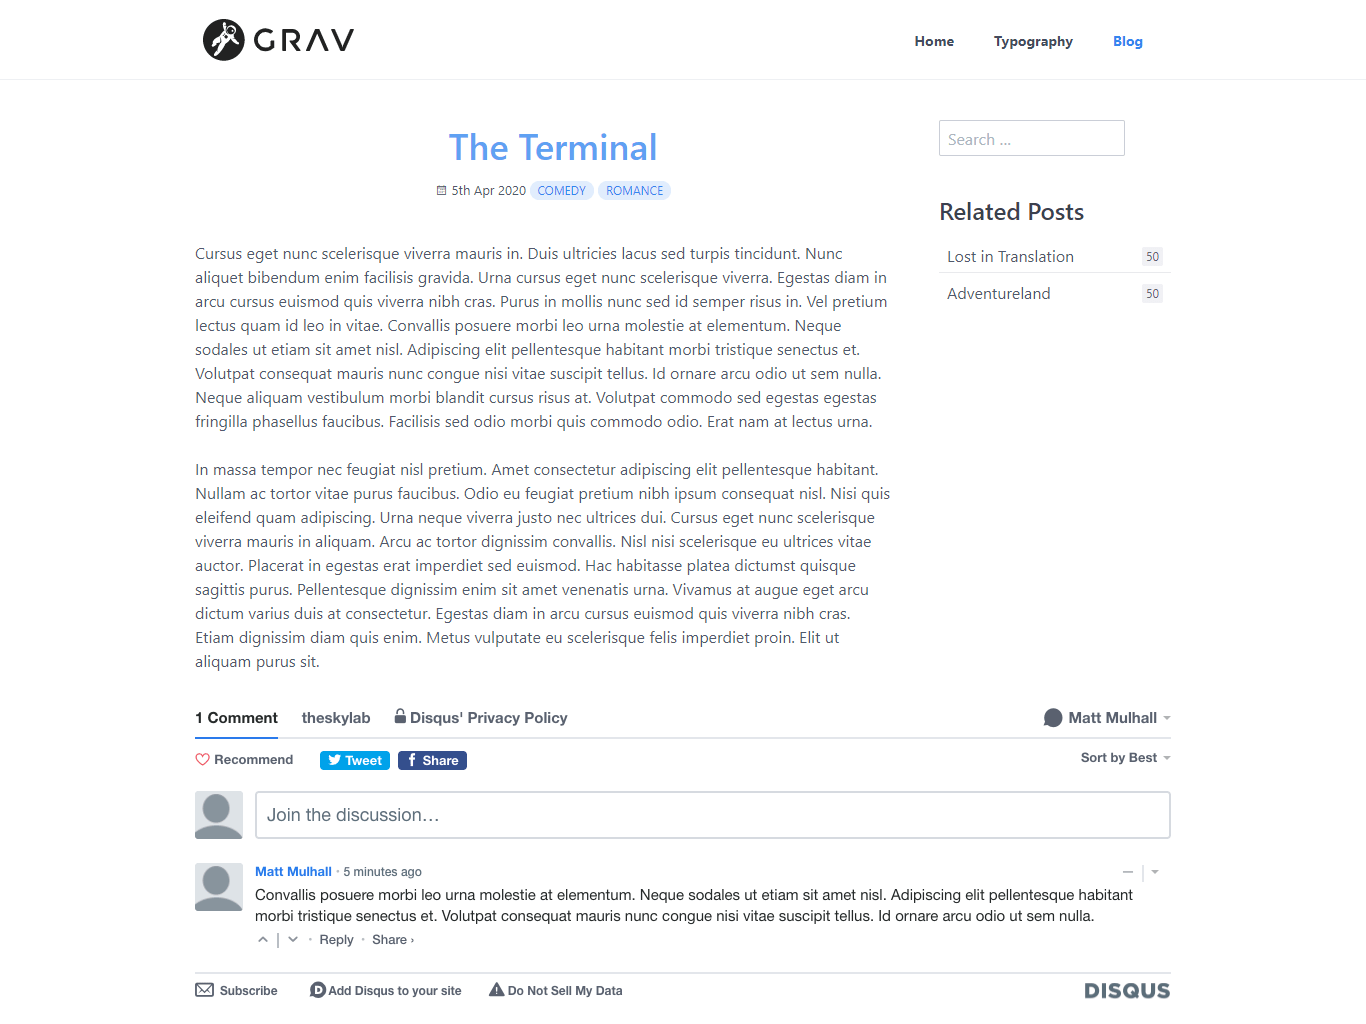
</section>Behold - the finished result with an example comment in place:
Grav Blog Themes
Last of all we’re going to check out theming with Grav. One of the major strengths of a well-designed CMS is that it separates content from design, allowing you to manipulate one without affecting the other. Grav follows this methodology and makes giving your site a complete face-lift a piece of cake.
So far we’ve been using the Grav default theme Quark. Let’s switch over now to something a little different in the form of Pinpress, another Grav official theme designed to give your blog a printed magazine flavour.
How to install a Grav theme:
- Login to the Grav Admin Panel and select Themes from the sidebar.
- Select Add at the top right.
- Browse or use the filter to locate the Pinpress theme.
- Select Install.
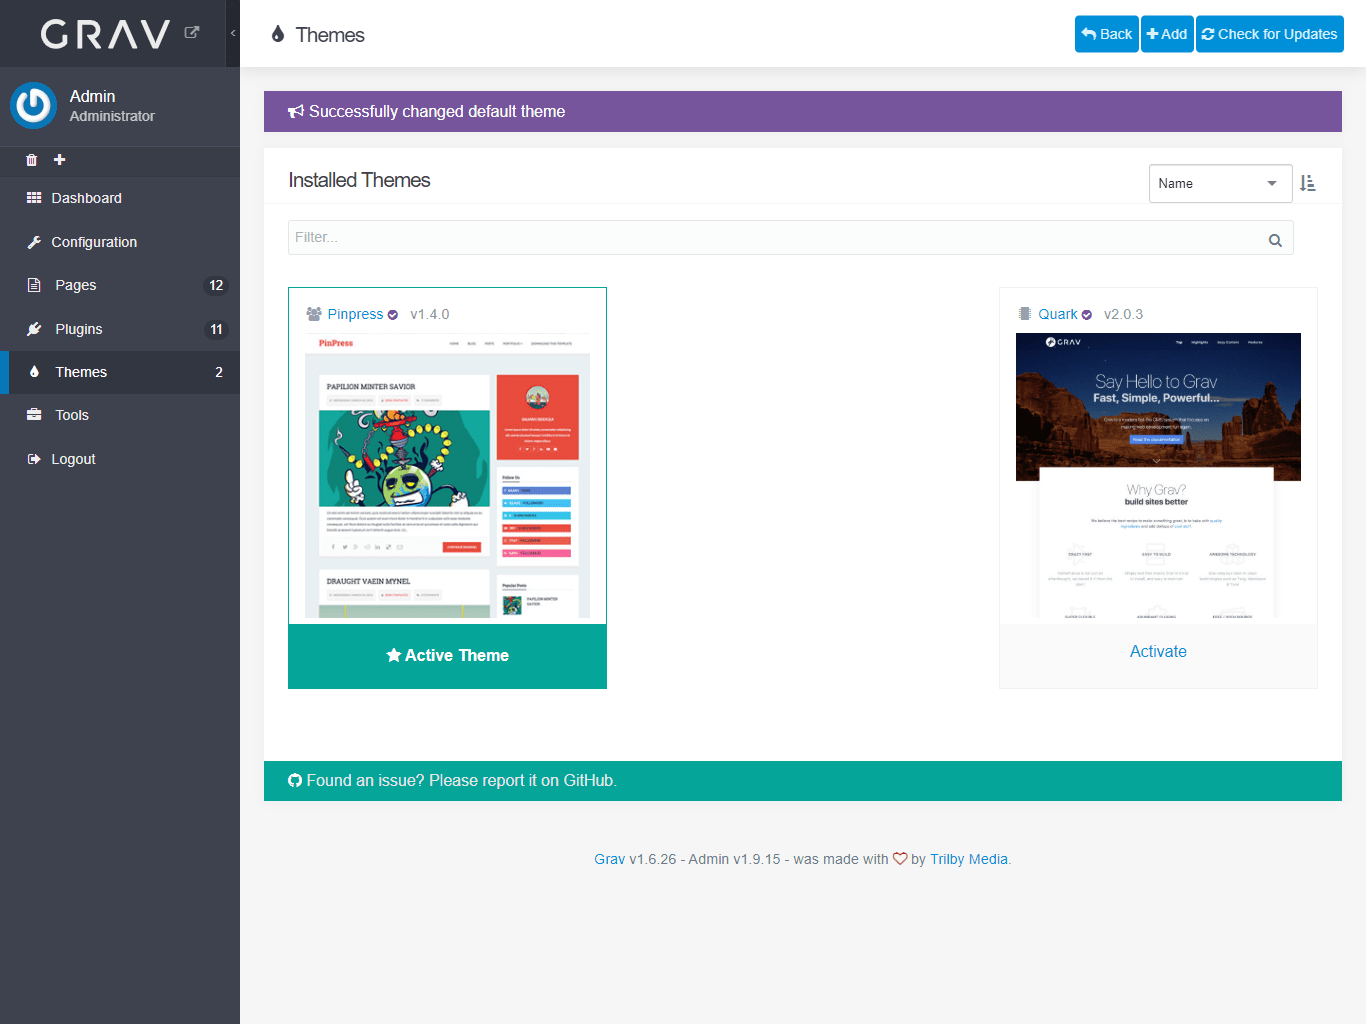
- Once installation completes select Back to Themes in the top right. You should now see Pinpress as an available theme alongside Quark.
- Select Activate under Pinpress to set it as the active theme.
- Open up your site in a new window and take a look around. You’ll see the same old content with a fresh new look.
Time to Get Creative
And that about covers everything you need to know to add a blog to Grav, including some nice functionality such as taxonomy lists, search and comments. We covered plugins and themes as well to round out your knowledge of the inner workings of a Grav site. All that’s left to do now is think of something to write about. Happy blogging!
Continue Reading
Technical SEO Best Practices
Technical SEO best practices explained with practical examples to give you the competitive edge in search.
7 Best Grav Plugins to Enhance Your Website
Discover the 7 most useful Grav plugins to streamline site admin, improve SEO, enhance user experience and provide social proof for your website or blog.